Download PDF Version of the Instructions
Overview
Creating service accounts for Identity Automation requires that an account be created in Munis Cloud Admin and an account be created in User Attributes. If you have any questions on creating this account, please contact EERP@education.ky.gov.
Cloud Admin
In Munis Cloud Admin, from the dropdown menu select: User Account Management > Create User.
Create the Identity Automation service account using the provided service account name found in the spreadsheet CUES Service Accounts in EERP. The leading customer number should not be entered when creating the account. For example, the KDE account for Identity Automation is IASrvActKDE. Please refer to column D, Cloud Admin Account Name for your district’s account name. Account names are case sensitive so please use the account name as it appears on the spreadsheet. HINT: Copy and paste from column D to the Username field in Munis Cloud Admin.
Enter the following attributes:
Username: Follow the guidelines in step #2.
Password: Leave as the default. Identity Automation will reset the password.
First Name: Identity
Last Name: AutomationSrvAct
Email: ky_support@idauto.net
Select “User needs a SQL reporting account.”
Select Create User
Email both EERP@education.ky.gov and ky_support@idauto.net with the IA Service Account name. Failure to email both accounts will delay proper configuration of the service account.
.png)
Create Identity Automation Role in Enterprise ERP
Navigate: System Administration > Security > Roles
Select Add
Create a new role with the following attributes:
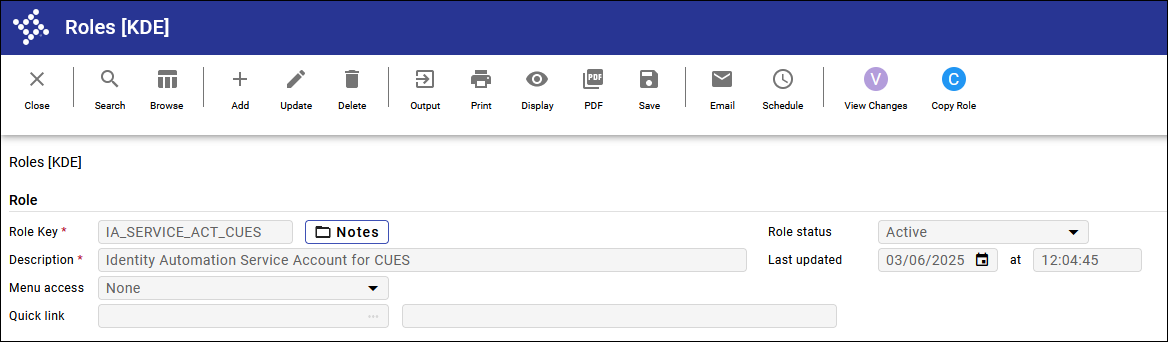
Role Key: IA_Service_ACT_CUES
Description: Identity Automation Service Account for CUES
Menu Access: None
Munis System Role
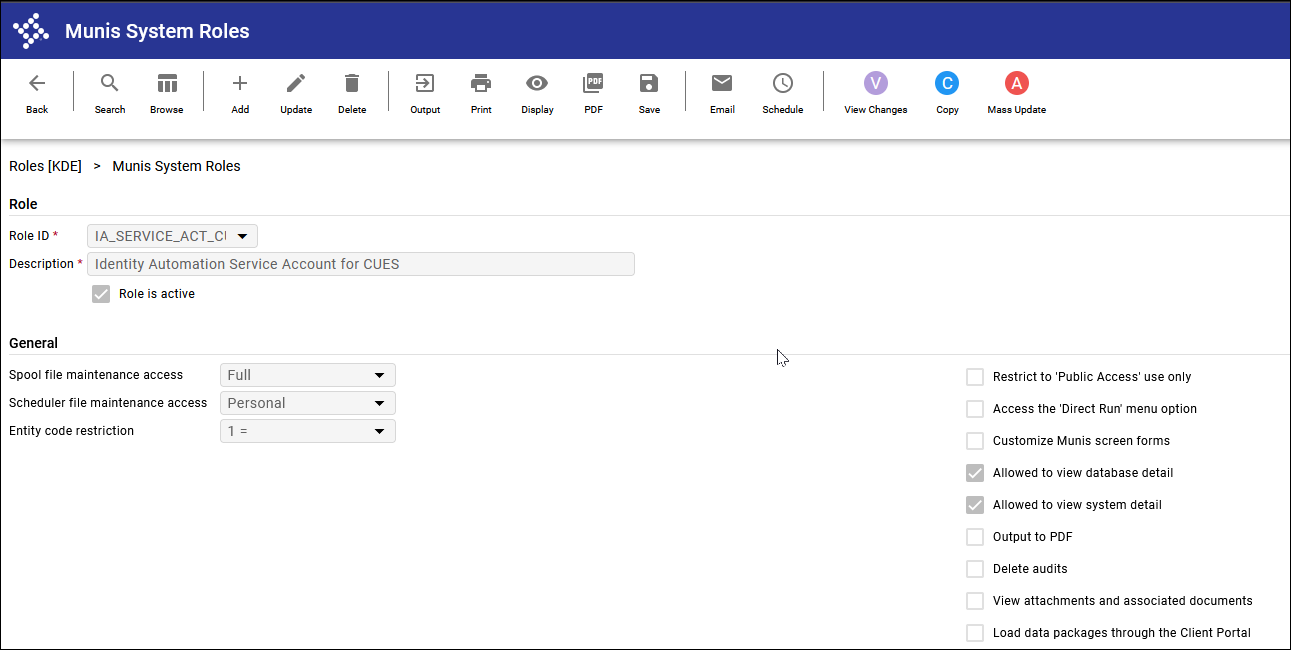
Select the Munis System folder and select Add. Enter the following as seen in the screenshots below:
Allowed to view database detail
Allowed to view system detail
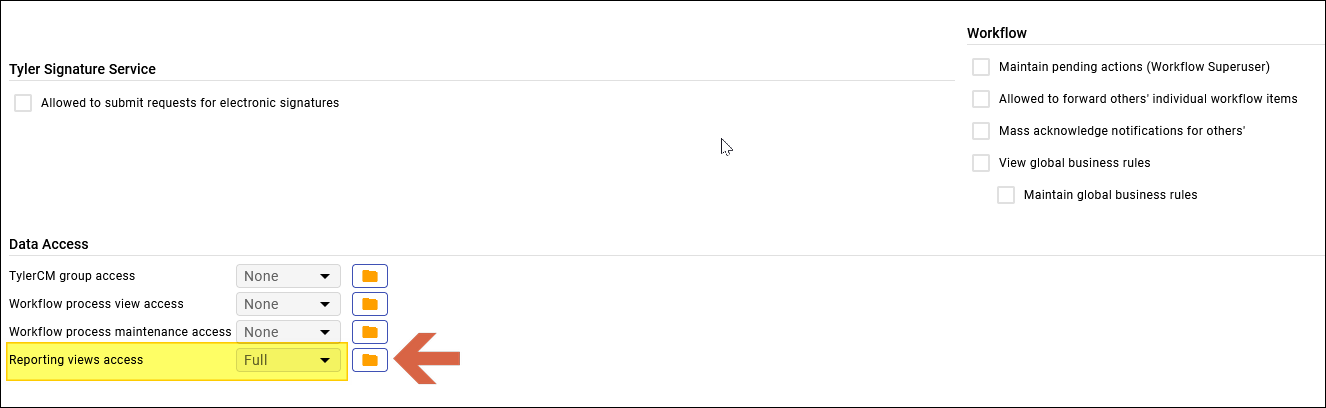
Data Access: Reporting Views access = Full
HR Management / Payroll
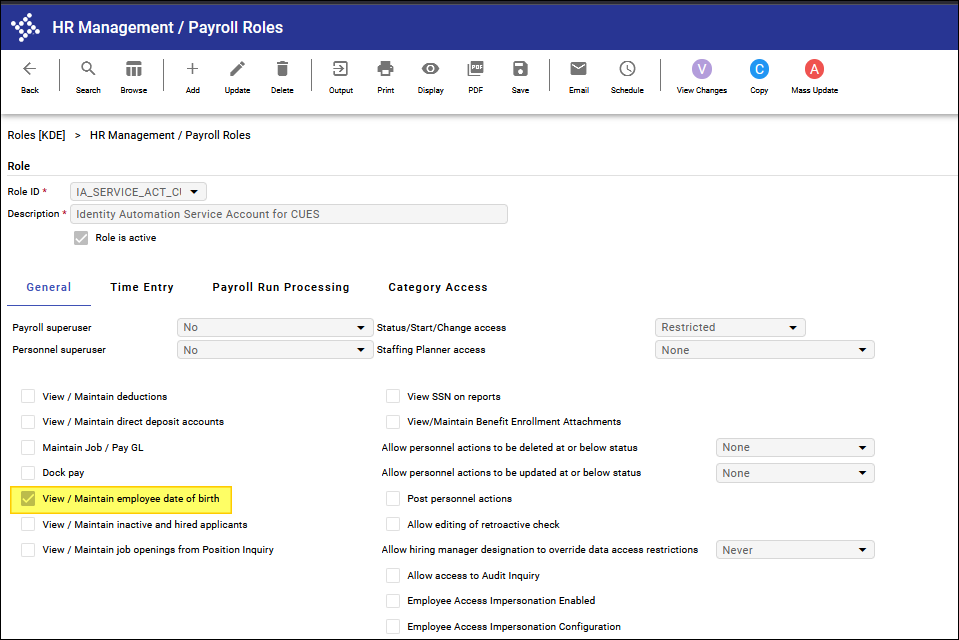
Select the HR Management / Payroll folder and select Add. Enter the following as seen in the screenshots below:
View / Maintain employee date of birth
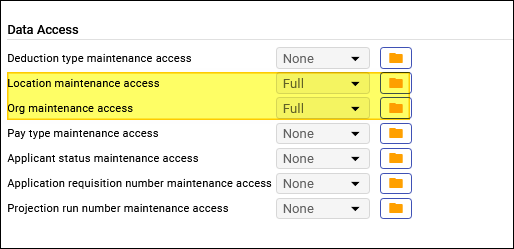
Data Access
Set the data access to the following:
Location maintenance access: Full
Org maintenance access: Full
Category Access
Select the Category Access tab and Update the following under the Employee Master and Terminated Employees columns:
Employee Master Address: Hide SSN (Upd / Del)
Employee Master Main: Hide SSN (Inquiry)
Employee Pay: Hide SSN (Inquiry)
Employee Certifications: Hide SSN (Inquiry)
Employee Master Demographics: Hide SSN (Inquiry)
Employee Master Dates: Hide SSN (Inquiry)
Hint: You can sort by selecting the headers (Category, Employee Master, etc.). After making updates and saving (Accept), select the Employee Master header and sort to verify all the proper categories were updated.

Create IA Service Account in User Attributes
Navigate: System Administration > Security > User Attributes
Select Add
Create a new user with the following attributes:
User ID = CUES Service Account name you created in Cloud Admin. *The account must include the leading customer number seen on the Cloud Admin account.
Name: IA Service Account
Short Name: IA Servi
Initials: ISA
User account status: Enabled
E-mail address: ky_support@idauto.net
Under Roles select IA_Service_ACT_CUES
Select Accept
A warning message may appear “Attributes Not Populated,” you can select No to this message.
An example of the IA Service Account in KDE’s environment can be seen below:
.png)